An Everday Carry List (That’s Actually Practical)

I became interested in the Everyday Carry (EDC) world a few years ago, but quickly noticed that many of the suggestions had to do with natural disasters and nuclear fallout events– not people’s real, everyday lives. It’s good to be prepared for emergencies, but let’s be honest that the worst situation most of us are likely to come across is a flat tire.

EDC is particularly important to me because I do not drive, so anything I might need throughout the day has to be carried on my person and not left in a car long-term. Your situation might differ, but it is still good to be intentional about what you bring with you, so you don’t forget important items NOR carry around much more than you need.

The Container

The first thing you need to consider is what you’re going to put your EDC in. (If you don’t have the actual item yet, that’s okay– just consider your needs.) Many people prefer a small bag or fanny pack or even their pockets, but I like to take a slim backpack with lots of small zippers. The reasons for this are a few:

  • Backpacks are gender neutral.
  • I can carry more than I would be able to in a small bag. (Obviously.)
  • My state doesn’t do plastic bags at grocery stores anymore, so if I’m out and about and pick up a few things, I can put them in my backpack and not have to carry them in my arms.
  • If I decide to augment my EDC with temporary supplies like my laptop or a book, I don’t have to switch bags.
  • I can put my water bottle in the side pocket and not have to carry it in my hands.
  • It’s water resistant for the rain.
  • The backpack is slim, with just enough room for my laptop and a few other things, so it has all these advantages without being bulky.

The Single Most Important Item For Your Everyday Carry

The absolute most important thing you can carry with you is a full day’s worth of your prescription medications. There are many mundane AND emergency situations where you might need them. Besides the stuff in your wallet, your prescription medications are the most impossible thing to replace while you’re out and about, so make sure you have backups. Don’t put your health and your ability to function at risk. Keep with them a list of the names of all the medications you are on, dosages, and what they treat, which can be referred to during doctor’s visits or given to EMTs in a crisis. You can get a special pill container or just put them in a plastic baggie.

Other Items to Consider

  • Phone, wallet, keys. The obvious. Your wallet should include your ID, medical card if relevant, and both digital and physical money. Put your phone in a reasonably rugged case and pare down your keys as much as possible. If you struggle to remember which keys are which, you can mark them with color-coded nail polish or special key-distinguishing markers. If you feel unsafe, there is no worse situation to be in than standing outside your car or house fumbling with your keys.
  • Phone charger (cord AND brick) and a portable battery for charging when you’re not near an outlet. Phones might be the most important tool we have nowadays, and if your phone is charged, you can deal with most unexpected situations.
  • Non-prescription medications that you may want to have, like antacids or painkillers.
  • Bus supplies, like single dollar bills or a refillable bus card, route maps, etc. Even if you don’t ordinarily take the bus, your car might break down. If busses are not feasible where you are, keep taxi or Uber/Lyft information handy and money (physical or digital) to pay for them. Carry with you anything you might need to get back to your house if something unexpected does occur.
  • Water bottle and snack. I find these things to be indispensable in my EDC because I am very sensitive to being hungry and my ability to cope quickly fades.
  • Some sort of self-defense item, like pepper spray or a key chain cat face with pointy ears (you put your fingers in the eye holes, like a legal form of brass knuckles). I have never needed the one that I have, but I know that it makes some people feel safer. Make sure it is easily accessible.
  • A notebook and a writing utensil. Your notebook can be full-size, like your bullet journal or planner, or just a small pad. Your writing utensil should be reliable. Maybe have two.
  • TWO sets of earbuds. This has saved my sanity on numerous occasions, and won’t take up too much space in your bag.

A Final Note

Just because you can take it with you, it doesn’t mean you should. Try paring your EDC down to what you might need in REALISTIC emergencies.

How to Ascertain What You Want

Today’s post is just a small tip. I call it an “I Want” list. I use it to figure out my true feelings on something.

Start a list in a notebook or app– you can do it like a traditional list or like a paragraph. Title it with whatever your subject is.

Start every line with “I want” or “I don’t want” and then finish the sentence. (I have also done variations like “I like,” etc.)

When you run out of things to write, go back through and get more specific on each sentence as necessary. Write until you run out of things to write!

For example, I made an I Want List for the direction in which to take my blog. My first entry was “I don’t want to make an email newsletter.”

Another example: I made an I Like List and wrote down “I like queer history.” When I went back through, I wrote down an additional entry to expand upon the first: “I like watching queer history videos on YouTube.”

This is a VERY simple exercise that has proven extremely useful to me. I hope it is for you too!

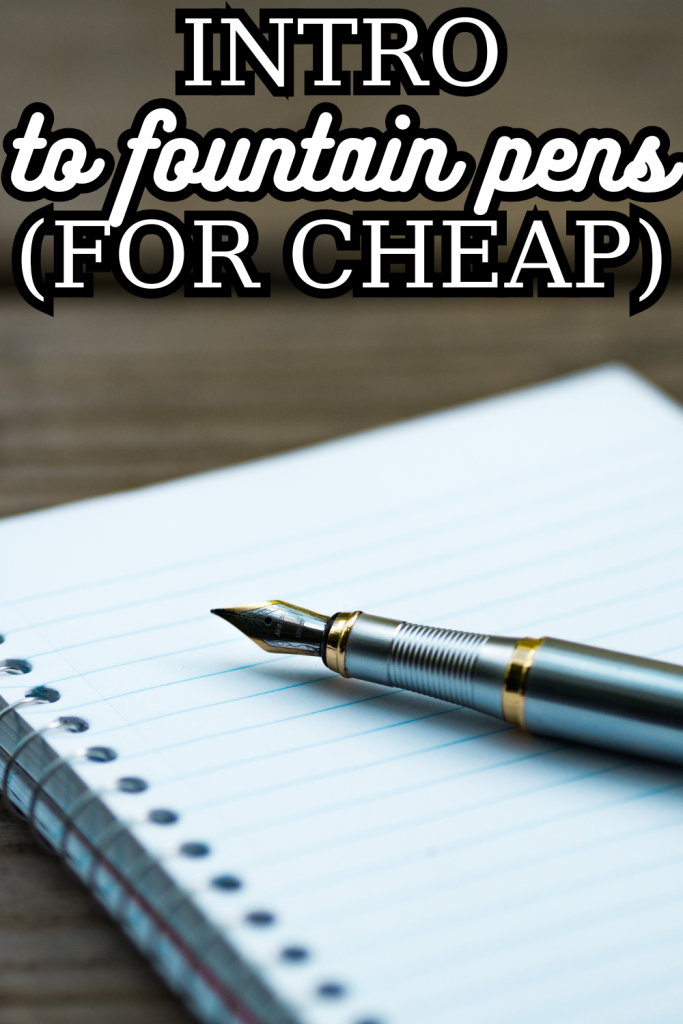
Intro to Fountain Pens– for Cheap!

Fountain pens? Why, when ballpoint or gel pens are available, would you spend extra money on something as frivolous and anachronistic as a fountain pen? At first glance, it seems silly to spend exorbitant amounts of money on a single pen, but it’s definitely possible to get into the hobby for much less than $50.

If you care about your hand-writing experience, I highly recommend experimenting with fountain pens. Let’s look at what you need to know to get started.

Note: NONE of the links in the following article are affiliate links. I make no advertising revenue on this blog. If you would like to support the blog, you can sign up on Patreon!

Why use Fountain Pens?

  1. They provide an unbelievably upgraded writing experience. If you’ve ever used a fountain pen, you know that they provide a much better flow and feel deliciously smooth on the paper. If you haven’t, I recommend getting the cheapest possible supplies and doing some experimenting. It’s like painting with a paintbrush versus scribbling with a crayon, even at lower price points.
  2. You can customize your writing with fun and fancy inks. If you’re sick of plain black or blue ink (which I am not personally, but if you were it would be understandable!) there are a PLETHORA of inks out there, in every color you could imagine. Some even have glitter (called shimmer), or change color where they pool (called sheen).

How to Get Into Fountain Pens— For Cheap!

What to Buy

  1. The pen. If you don’t want to make a large monetary commitment, you can get a fountain pen for less than $10, like from the Jinhao brand. The upgrade in writing experience is immediate, even with cheap pens. If you already know you like fountain pens, I have heard great things about the Lamy Safari, which is less than $30 and comes in an array of colors.
  2. Ink. If you want to experiment with many different inks, you can pick out samples or get random ones from Goulet. My favorite ink for everyday use is Parker Quink in black. It is quick-drying so it’s less likely to smudge during normal writing.
  3. Optional: converter. Depending on the pen you buy, you may need a separate piece to hold the ink inside the pen. The Jinhao brand seems to come with them, but if you get another pen, you should bear in mind that you might need it. Do your research on the model of pen you want to get!
  4. Optional: blunt syringes. Depending on the pen you get, you may need to fill the converter or the ink chamber with a blunt syringe. Getting syringes also allows you to use any ink samples you may get, because you probably won’t be able to dunk your whole pen in the small vial to fill it up.

Let me know if you end up experimenting with fountain pens and how it goes! Have fun writing!

How to Create a Reading Journal You’ll Actually Use

Reading journals have become big business recently, in large part because of a growing movement that promotes mindfulness in a hectic world. Whether you read paper books, ebooks, or audiobooks, it can be extremely valuable to track your reading. However, it can be hard to get started and even more challenging to keep with it.

Here are some of my thoughts on reading journals.

Reasons to track your reading:

  • you want to remember what you read.
  • you want to get more thoughtful about books.
  • you need a place to take notes from the things you read.
  • you want to make sure you’re reading a variety of genres.
  • you want to connect with other readers by writing reviews on GoodReads, StoryGraph, or a blog.
  • you want to read a certain number of books in a certain time frame.
  • you’re curious about what books you gravitate towards.
  • you’re curious about what tropes you like.
  • you want to compile a list of your favorites.

Got more reasons to keep a reading journal? Let us know in the comments below!

Pre-Made or Bullet Journal Style?

There are a ton of pre-made reading journals out there, to the point that, despite oodles of reviews online, you may find it overwhelming to try to pick one. In that case, I recommend making your own!

The rest of this article will deal primary with make-your-own reading journals, with a heavy influence from the Bullet Journal Method.

Think: what is the purpose of your reading journal?

The main purpose of my reading journal is to remember what I read, because I have memory issues. I often feel like I don’t know what I did with my time, including what I read, so I keep track. I also like to give myself credit for all the reading that I do before I decide a book is not for me, so I even keep track of books I started but didn’t finish!

Yours might be different, and become a place to list all the exciting things you might read next! Or maybe you’re goal-oriented and want to see how many books you can finish in a year! Or maybe it’s primarily an art journal! The possibilities are endless.

My point is, it’s important to choose a primary reason for your reading journal so that you know what to include or which one to buy, if you’re taking that route.

Here are some reading journal page ideas, from my own reading journal:

  • A title page. I recommend that this have your name and contact info in case it’s lost, as well as the dates the journal covers. That way, in the future, you can easily find what you read by time period.
  • A Table of Contents like in the Bullet Journal Method. I only include pages I will want to reference frequently, but you may choose to include everything.
  • A running list of the books you have finished. For me, this is a simple numbered list with the book’s title, author, and the date I finished it. I make a new list for each year.
  • A reading log. This is different than the books you’ve finished, because it’s arranged by date and chronicles books you may not have finished. I don’t always finish the books I’ve started, and I still want credit for them, dammit! My reading log is a chart with the date, title, author, and a column where I can draw a star if I finished it that day. I do this particular chart with the notebook turned landscape so I have more room to write the title.
  • A library books tracker. For me, this is another chart with the title, author, three columns for me to write the due date, and a column to check off if I’ve returned it. In my library system, we can renew books twice, so I might need all three spaces.
  • A To Be Read, or TBR. Obviously! Make sure you write down both title and author.
  • A review template. Mine includes title, author, publication date, star rating out of five like on Goodreads, genre, diverse voices, and who I would recommend this to. If you like, you can also include the format (like ebook or audiobook). The rest of the page is divided into two columns: things I liked and things I didn’t like. I make a review page for each book I start and write in it as I go, but other people may choose to only do review pages for books that they have finished.
  • Review pages. My review pages are rewritten from the review template, and contain a big star if I finished it.
  • Book notes. You might be reading fiction or nonfiction– I know I read both– and either way, you might want to write notes. I often write chapter summaries for fiction. For me, these are separate from the review pages.
  • Quote pages. Sometimes a quote from fiction or nonfiction will really strike me, so I write it on its own page. Make it artsy if you like!
  • Vocabulary. If you’re an enthusiastic reader, you might not often come across words you don’t know the definition of, but when you do, you should definitely write it down and look it up! Camp Damascus stumped me with “gelid” and I have never really understood what “philology” is. If you keep a running list, you will avoid being stumped in the future and learn something new!
  • Recommendations you’ve gotten and who recommended them. Sometimes, the person doing the recommending matters a lot! You may have reviewers whose tastes match up with yours, or friends whose opinions you trust! I have a special page for books I was recommended through my single month of Tailored Book Recommendations. (I was so curious I had to give it a try, and I learned a lot about my own preferences just from answering the questions that the service gives you!)
  • A list of your favorite books of all time. For a challenge, try to pare it down as much as possible!
  • Least favorite book of all time and the book that challenged you the most. Mine are, respectively, Ethan Frome and Rosencrantz and Guildenstern are Dead.
  • DNF (or Did Not Finish) page, with a list of your DNFs and why you stopped reading.
  • Series lists, to keep track of each book in a series.
  • Finally, an index. Mine is in the back of the book and records titles as well as authors (by last name) and the pages on which they appear. I allotted about 10 lines per letter and just fill them in as I go.

Do you keep a reading journal? Have I missed anything? Let me know in the comments below!

Bullet Journal in a Happy Planner: The Key

This quick post will discuss the symbols I use in my Happy Planner Bullet Journal, which is just like any other Bullet Journal except the pages can be added, taken out, and rearranged.

The symbols I use, on my calendar and elsewhere, are:

  • A dash for notes, of any type.
  • A square for tasks. The original Bullet Journal method prescribes dots for tasks, but I don’t feel that that stands out enough. Squares are also more satisfying to check off.
  • A star for “anything I have to show up to.” This includes appointments (video and in-person), irregular work shifts, or any event with a specific date and time. As a freelancer, it was important for me to note meeting times, since the rest of my days were unstructured.
  • A circle for due dates. This was very important during my career as a freelancer, and I’m sure will be important again as I go into grad school. I also use it for library books. Using a symbol specifically for due dates eliminates the need to write “_____ due,” saving space. It also allows me to scan for upcoming paperwork I need to turn in or bills I have to pay.

Bullet Journal in a Happy Planner: Method

In the previous post, we talked about how to get started Bullet Journaling in a Happy Planner.

In case you missed it, the Happy Planner is a ring notebook that allows you to add, remove, and rearrange pages. It’s often pre-printed with traditional planner pages, but I took those out of mine and put in blank dot-grid pages from the company Talia. Happy Planners come in three sizes (Big, Standard, and Mini)– I recommend the Big size because, with a specialized hole-punch, you can add standard letter size paper. This could be useful for keeping track of important mail, or you can create or buy printables. Your imagination is really the limit here.

One notebook to rule them all?

The Bullet Journal system is designed to consist of one notebook, though there are many variations, and people often find it most convenient to use multiple notebooks for different topics. My Happy Planner Bullet Journal has a variety of different sections, and I use it for all my life administration, but I have additional notebooks for my witch journal (also known as a Book of Shadows or grimoire) as well as my reading journal. (Posts about those are in the works!) I definitely think that having one notebook is my ideal, but you should do what works for you!

Divider Sections

One of the biggest innovations of the Bullet Journal system, in my opinion, is that you just use the next available page for whatever you want to write (or draw, or design) and then add it to your index. However, the Happy Planner has the ability to move pages around. Therefore, I don’t use an index, and use divider tabs instead. When I sit down to Bullet Journal, even when using a regular bound notebook, I flip through every page to see if there’s anything that needs to be written down, migrated, or recorded. (That sounds like a lot, but it only takes me about 10 minutes a day to do this.)

The sections are labeled:

  • BuJo. This is where I keep my life administration stuff that I made myself, and this is the section I flip through every day. More on this below.
  • Notes. This section is really going to come in handy when I start grad school. Right now, most of my book notes live in one of my other journals.
  • Journal. This is where I do my Morning Pages as well as any other long-form writing I might do throughout the day. I do Morning Pages a little differently, and tend to write about what I’m going to do that day. I find more focused writing to be better than just freewriting for me, but everyone’s brains work differently!
  • Blog. Self-explanatory.
  • Paperwork. This is where I keep things I have hole-punched to add, like important mail and legal information.
  • Blank. This is where I keep blank dot-grid pages to add to the other sections.

Bullet Journal Pages

The Bullet Journal section is my main section.

Pages that I find useful include:

  • Contact info for if I lose my notebook.
  • A future log/yearly calendar with space to write important info, like far-off doctor appointments.
  • Monthly calendar in a traditional grid format
  • Life focuses (post about this incoming!)
  • Task list, both short-term and long term projects. (I might divide this up in the future, but for now I have it all as one list.)
  • Weekly symptom recording by day.
  • Monthly reviews. This is part of the Bullet Journal method, and consists of asking “What worked and what didn’t?” Traditionally, the scope is within your notebook, but I like to ask the question of both my organization system and my entire life.
  • My Points System. Discussed in an old post, this is my system for getting stuff done. I have a points goal for the day, and each reasonably productive activity gets me a certain amount of points depending on effort.
  • Habit Trackers.
  • Finished books for this year.
  • Passwords. I am very careful with my notebook for this reason.
  • Things to bring up to the doctor.
  • Health appointment log. This is where I write down any notes from doctor’s appointments, like what we discussed and what the results were.
  • Miscellaneous Lists.

Coming up soon: my unique Bullet Journal key and how I use it.

Bullet Journaling in a Happy Planner: Supplies

Unlike the Bullet Journal, the Happy Planner is more of an item than a system. However, it has changed the way I journal and I couldn’t be happier. This is the first post in a series about how I use the Happy Planner as a Bullet Journal.

The Happy Planner is a notebook that is bound in rings, kind of like a binder but better (we’ll get to that in a sec). It looks like this:

Here you can see the rings that keep it together, and some of the pages that might be inside.

Happy Planners are often pre-printed with traditional planner pages, but you can swap out the paper and do almost anything you can imagine!

Is the Happy Planner right for me?

Okay, I’m going to be extra-honest with you. Bullet Journaling can change your life, but Happy Planner stuff can be expensive and lock you into a system that you may not be happy with. Biggest tip in the entire post: if you’re new to Bullet Journaling, test it out in a notebook from the dollar store. Yup, get any old notebook and just start taking notes on your life. Dive into the system headfirst, but not with your money. Find out what works for you and your brain before you buy anything expensive!

If you’re an experienced Bullet Journaler and you’re looking for a notebook that is more flexible, Happy Planner is something I definitely recommend, especially if you’ve considered using a ring binder. Discs are superior to ring binders because the pages don’t rip when you flip them!

What do I need to get started?

  1. A basic kit with a cover, rings, and page dividers, like this. I recommend getting the “Big” size, which uses 8.5 x 11 paper and has 11 discs. That way, you can frictionlessly add paperwork that’s on standard letter size paper.
  2. Extra paper, like this. I took out all the pre-printed planner paper that came with my Happy Planner, but you might want to use what it comes with. Either way, you’re going to want extra pages for notes and collections. This link will get you dotted 8.5 x 11 pages.
  3. A hole punch, like this. Whoa! $40 for a hole punch? Yeah it’s a lot, and it only punches 3 pages at a time, but I find being able to put mail and other paperwork into my notebook is priceless.

Other Things You Might Want to Get:

  • An extra kit with cover, rings, and page dividers. I have one Bullet Journal Happy Planner and one Archive Happy Planner, where I keep pages that are no longer relevant in my day-to-day life but I still want to keep.
  • A folio cover. I found this to be a necessity in case I’m walking somewhere, with my Bullet Journal in my backpack, and the weather turns bad. If my Bullet Journal got wet, I would be devastated. Therefore, I got a waterproof one.
  • Markers. The dots on the paper I recommended are a little dark, so I use markers for my page titles to make them stand out a little bit more.
  • A fountain pen. Fountain pens can be cheaper than you might expect, and while they take some maintenance and know-how, they are far more reliable than other pens and I find the approximately $30 investment to be worth it.

Things You Don’t Need?

I do not recommend getting pulled in by the myriad of tempting stickers that Happy Planner offers. They do not actually improve your Bullet Journaling experience at all, and they’re expensive.

Coming up next are some posts on the specifics of how I Bullet Journal in a Happy Planner. Stay tuned!